
How the unholy union of Paipo and Boogie became the Pogi Board
- Charles Kramb
- Aug 26, 2022
- 5 min read

This is the basic skeleton of the Pogi Board. It is made from 1/4" Birch plywood, the tail block is solid 2" x 6" and nose block is solid 1" x 4" Western Red Cedar. I use the Birch plywood because of it's strength, I have built some Paipo's with solid 1/4" Cedar, but it is more prone to bending and breakage than the Birch. In this photo you can see a slight curve near the tail block, this was due to the support brace being out of line.... needless to say I fixed that before glue up.

The holes in the stringer and ribs help lighten the overall weight of the board. I try to make these boards as light as possible without compromising the strength and durability of the wood.

I decided to use the solid cedar tail block to create a smooth body transition. This will ensure the rider has a comfortable mount when they slide the board under them. At this point the ribs, nose and tail block are ready for glue up.

The holes in the ribs are cut at the same time by utilizing a 3/4" hole bit on the drill press.

I allow the initial skeleton glue up to sit over night. The next step is to glue the first strips of cedar that will form the rails. I glue these two strip simultaneously to make sure there is no twist in the stringer or displacement of the ribs against the rail strip. I add small 1/2" x 1/2" blocks to each intersect component to strengthen and stabilize the joints.

In this view you cans see the notches that are cut into the tail block on the outside edges. These notches are in place to house the end of each rail strip. I do not use any nails, brads, or staples in the construction of my boards. Each one is designed in a fashion that utilizes natural seams that create a strong and durable base.

For the nose block I used a solid piece of cedar to act as the attachment point of the rails. Here I do a smaller notch than the tail block where only the base strip of the rail is housed. Subsequent rail strips will be glued over the case strip and up the side of the nose block.

For the Leash Cup mounting point I decided to use bloodwood because of it's density and strength. I use mainly cedar in my boards to lessen weight, but at points like the leash cup I need a wood that will stand up to to force and torque that it will experience when ridden.

Here I made the cuts in the tail block that will for the channels on the slick (under side) of the board. These channels will run approx 11" from the tail, fading as it progresses towards the mid section. The channels are designed to increase control of the board during maneuvers by increasing the underside surface area and controlling the flow of water through the channels. In this view you can see the desired depth and shape of the left channel (working from the tail it is left, view from the nose appears as right).

This view is the rough cut of the right channel. I will make an initial shallow cut on the right with the final depth (as marked in pencil) once I am happy with the shape and depth on the left channel.

Here is the initial cut on both channels. I use one of several Nokogiri (Japanese Pull saw) to make hand cuts when I work. Unlike US and European saws that cut with a push stroke, the nokogiri cuts with a pull stroke. I find that I have much more control of the blade when I cut with the pull instead of the push.

I used a wood chisel and mallet to remove the wood and smooth out the channel portions of the tail block. I abandoned the mallet and used just the chisel to get to the final depth needed for the channels.

Once I achieved the depth I wanted with the chisel I smoothed out both channels with 60 grit sandpaper.

Here you can see both channels carved into the tail block.


Every hollow core board that I build gets 2 feathers mounted in the core of the board. These feathers are tokens of balance, speed and agility that I hope every board achieves.
this is the feather that is mounted in the right compartment.

This is the feather that is mounted in the left compartment. in this photo you can also see the 1/4" rib brace that I glue to the rib to give more glue surface for the deck. I do this on both the deck and slick.

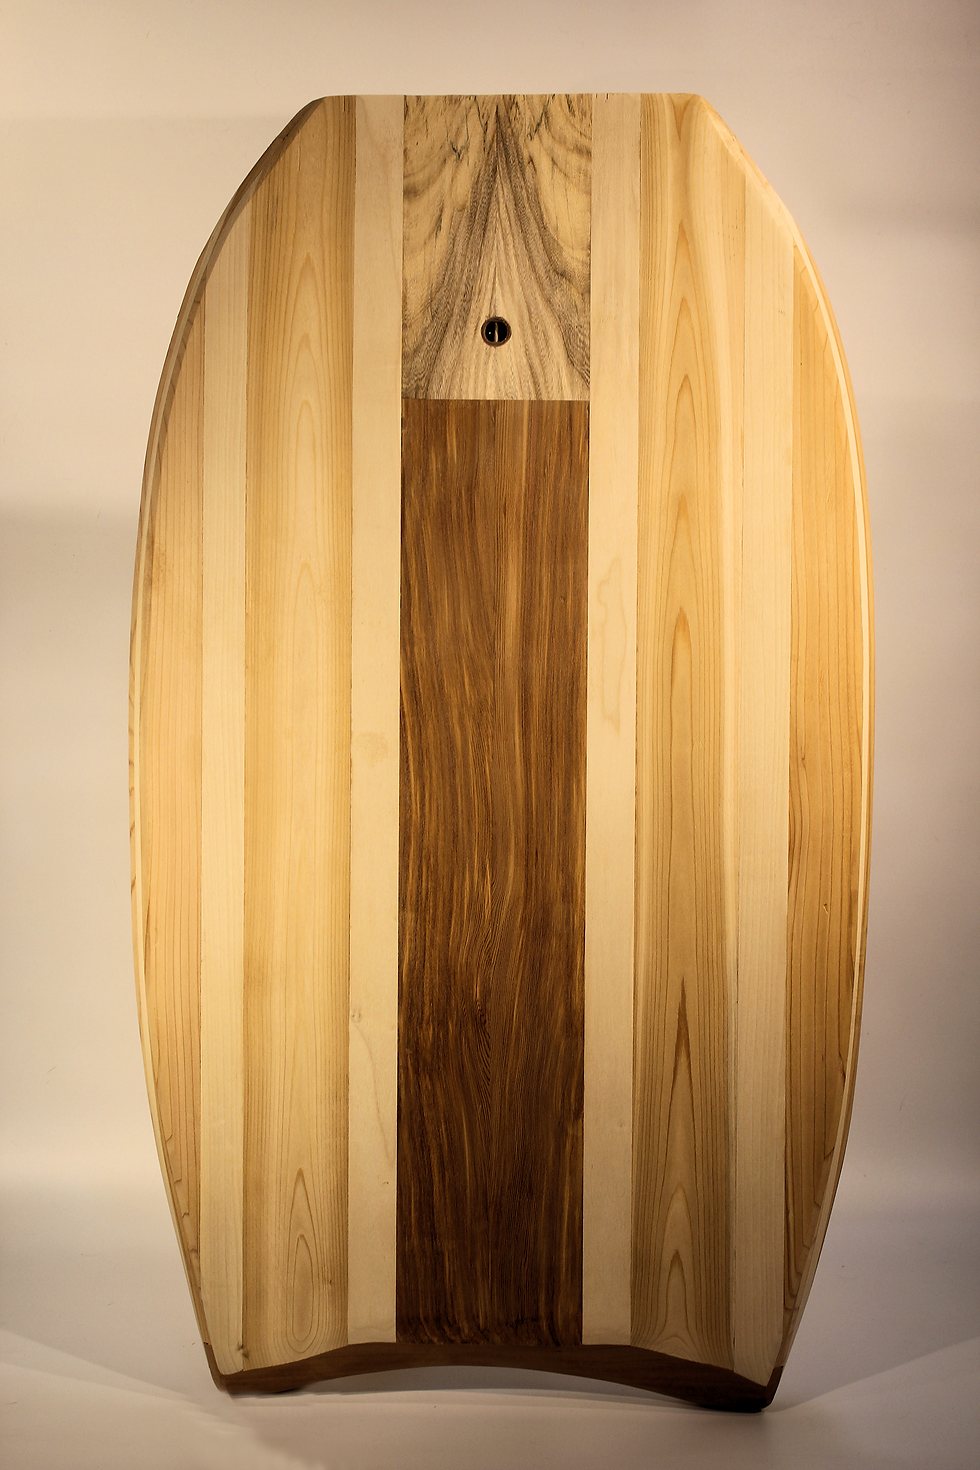
on this board I installed two Spalted Hackberry pieces at mid board. This wood is more dense and much harder than cedar and should stand up to the grind of shells and sand if beached.

The nose and mid sections of the deck have been glued and clamped. At this point I am ready to start attaching the strips that will form the channels.

Gluing the channel strips, this strips were all ripped at a slight angle for better fit and seam. This bevel forms the the curve into the channel, the bottom of the channel, and then the curve out of the channel.
I used Bloodwood for the bottom strip of the channel. Bloodwood is extremely dense and hard, when I shape the channel I will create a slight peak with the bloodwood. Sanding the channel will remove the cedar a little easier than the bloodwood, thus creating the peak. This should provide even more control, speed, and maneuverability than a smooth channel.

This photo shows the last strip being added to form the channel, this view shows how the beveled sided of each strip come together to form the curved surface.

This is a close up of the initial curve into the channel. I glue one strip at a time an allow adequate time to cure. The light colored strip on the far left is a sacrificial block that prevents damage to the glued strip by the clamps used to pull the strip tight to the neighboring strip.

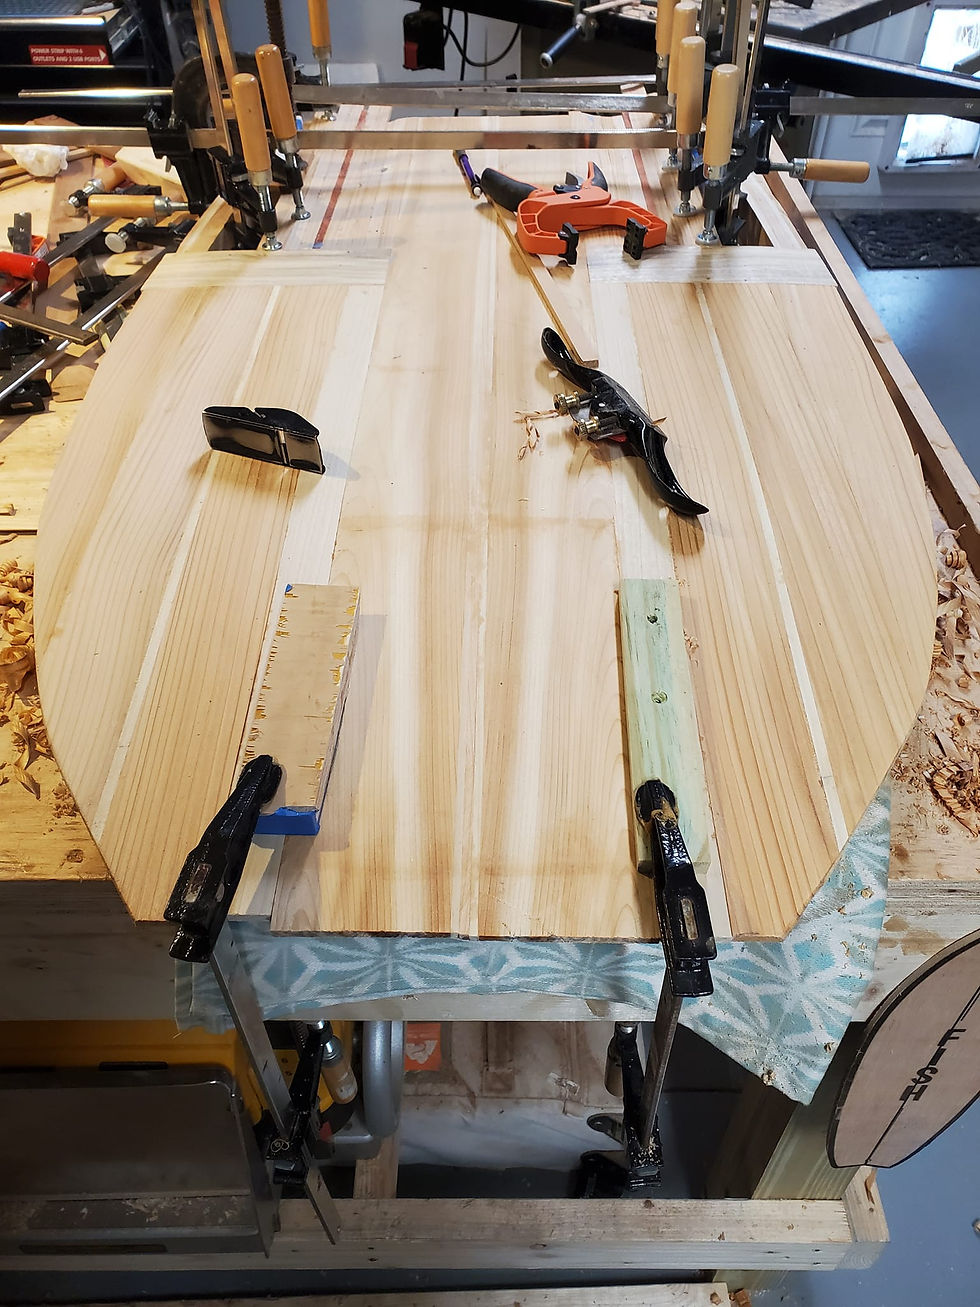
The deck and slick are finally completely installed and rough shaped. The next step will be planing the rails to shape.

I created this little guide by measuring from the center point of the rail gage to the perpendicular axis of the top angle. I mark the center of the rail and then I mark the top of the rail with this gauge and then use a hand plane to create the angle from pencil mark to pencil mark.

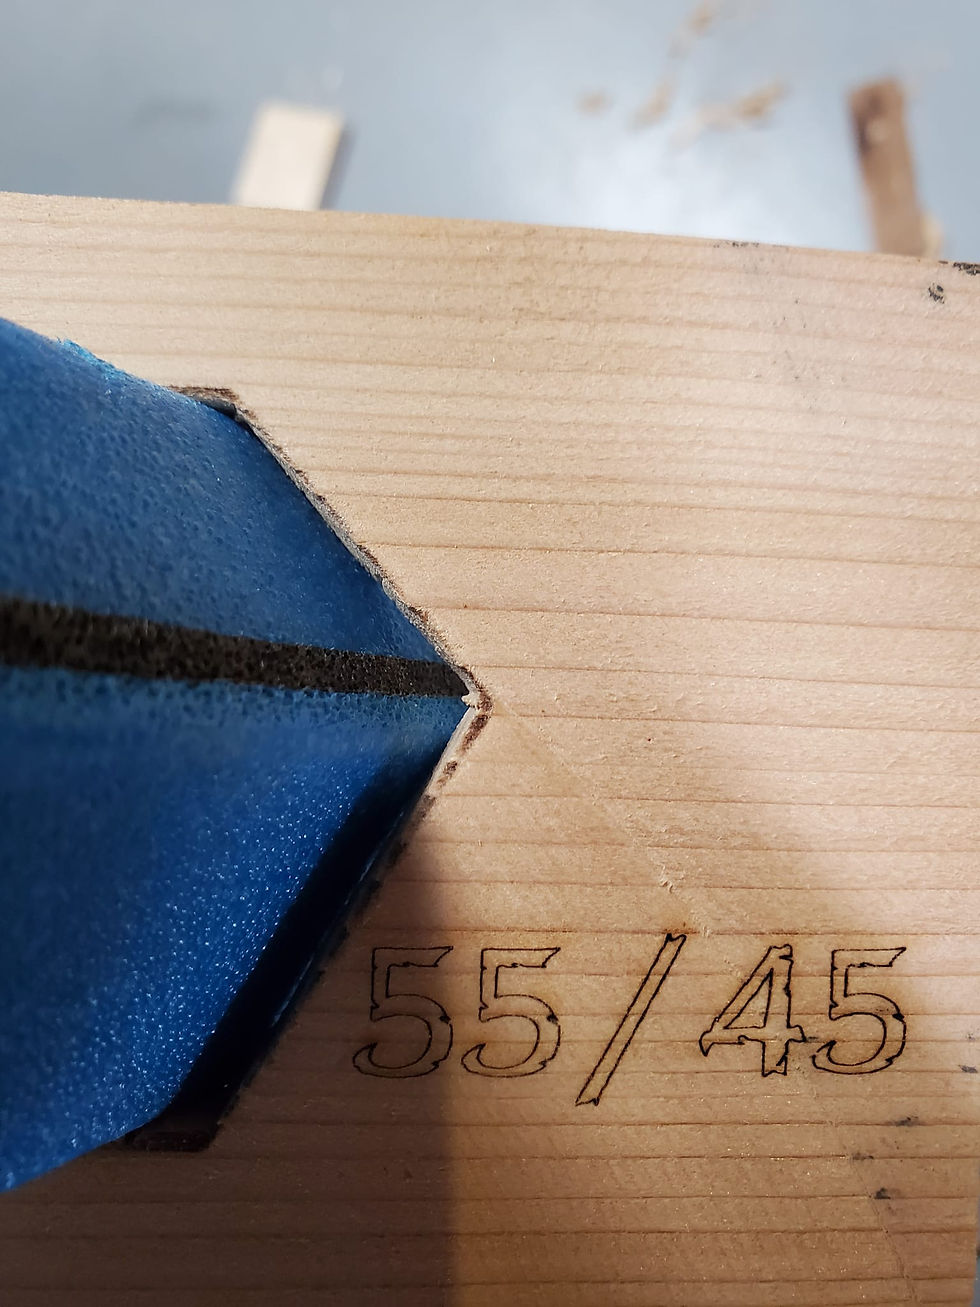
This is one of the gauges that I have created to measure and double check the angle of the rails. The standard for most body boards is either a 60/40 or 50/50 rail, I decided that I wanted to experiment with a 55/45 rail (go figure I don't want to follow a standard). A 55/45 rail denotes that the bottom portion is 55% of the rail and the top portion is 45%.

This picture shows the difference in a 60/40 rail with the bodyboard is and the 55/45 gauge. The black line does not run the center of the rail, the center is actually 1/8" lower.
The shaping of the rail is underway in this photo, I stop often to double check the angle, depth and shape of the rail. I use several different hand planes to shape the rails, standard block planes, pull planes and kanna (Japanese planes).

Maui has been great help while building this board, she actually like to lay under the board while I plane and swat at the wood curls as they fall.

The top portion of the rail is getting close to the proper angle, once it is close to the pencil mark I will flip the board and start on the other portion of the rail.

Once the rails are shaped to satisfaction, The excess wood on the nose and tail will be trimmed off and then file and sandpaper finish the job.


Comments